Contents
There are plenty of reasons because of which a speaker can get busted, which include excessive volume, excessive time of use, high-intensity music as well as clipping amplifier. Although this is very disappointing, yet, it has been seen that if you do not buy high-quality speakers and amplifiers, you are in a higher probability of suffering from a damaged speaker quite early within their operational period. So, now that you know about most of the causes because of which your speaker can get busted, it is a very good idea to know about how to fix a busted speaker as well.
You should always keep in mind that you have invested a whole lot of money for your speakers and hence, you should always consider repairing the equipment rather than buying a new one, every time your speaker gives some problems.
So, in order to repair your speaker, you will need to isolate the equipment and take it to a less crowded place for inspection. However, if the speaker does not look in good condition, you should always consider the probability of buying a new one rather than repairing the existing one. Apart from this, you will also need to estimate the amount of time you would consume to complete the entire repair process.
What are the steps to inspect in a busted speaker?
In order to carry out a perfect repair of your speaker system, you should always have an idea as to what kind of checks are needed to be done before the repair. Initially, it is a very good practice to perform a couple of checks on your speaker system to analyse the actual issues, because of which your speaker is not functioning properly. There might be a voice coil issue or some wiring problems, which can get identified easily during this process.
So, following are some of the critical checks which are needed to be performed before putting your hands on the actual repair:
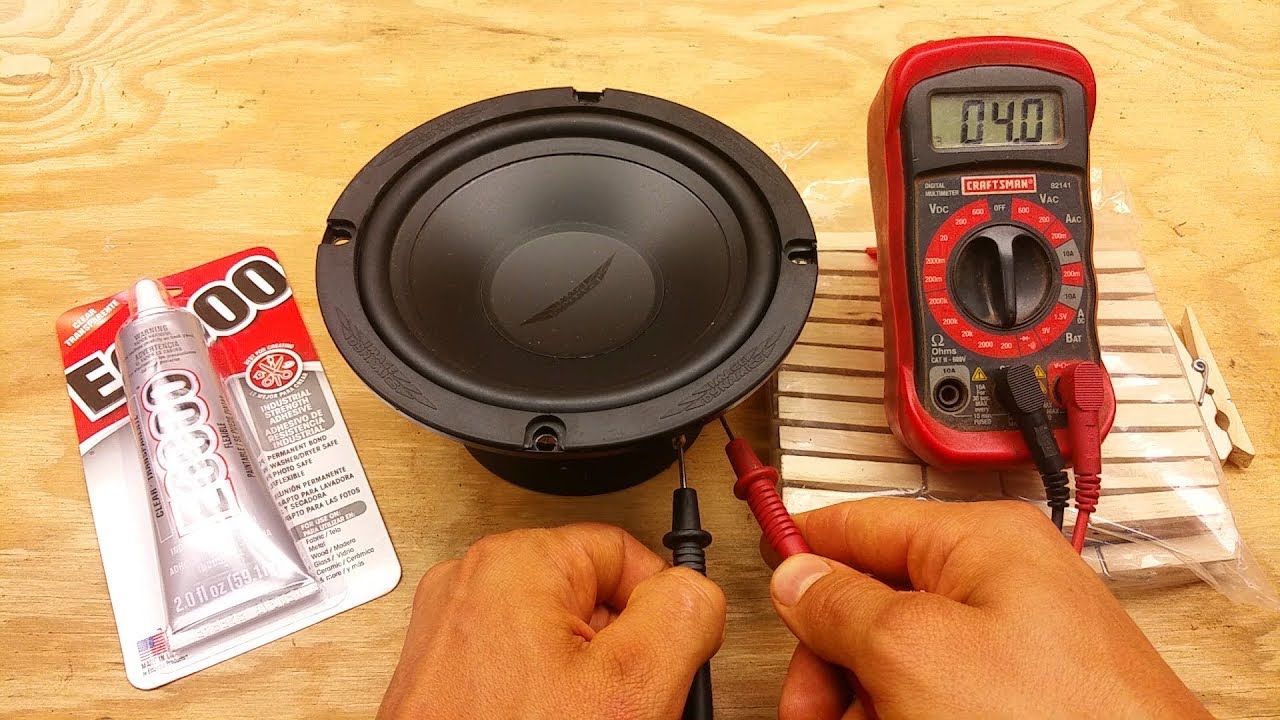
1. Blown Coil:
Each and every speaker system has a voice coil which has an active stream of current flowing through it. The purpose of this current is to push and pull the voice coil against the surface of the magnets in the speakers. Consequently, this up and down motion tends to vibrate the cone of the speaker in a lateral direction to create the sound effect.
However, if you are not so sure that the voice coil might be damaged, you should always use a digital multimeter to check if there is any fault. In order to do so, you will need to connect both the terminals of the multimeter according to the speaker and if there is very less resistance, it could be a case of short circuit and you can conclude that the voice coil might be damaged.
2. Damaged Speaker Cone:
So, once you check the voice coil and find that it is perfectly normal, you should now put all your attention to the speaker cone. It is very easy to detect any fault with the speaker cone as it is of membrane type and you can easily observe any kind of wear and tear of the speaker cone of your speakers.
How to fix a busted speaker?
Now that you have a perfect idea as to how you can check the basic faults in speaker system, it is a good time to learn as to how can we repair a busted speaker.
- Identify the Faulty Driver
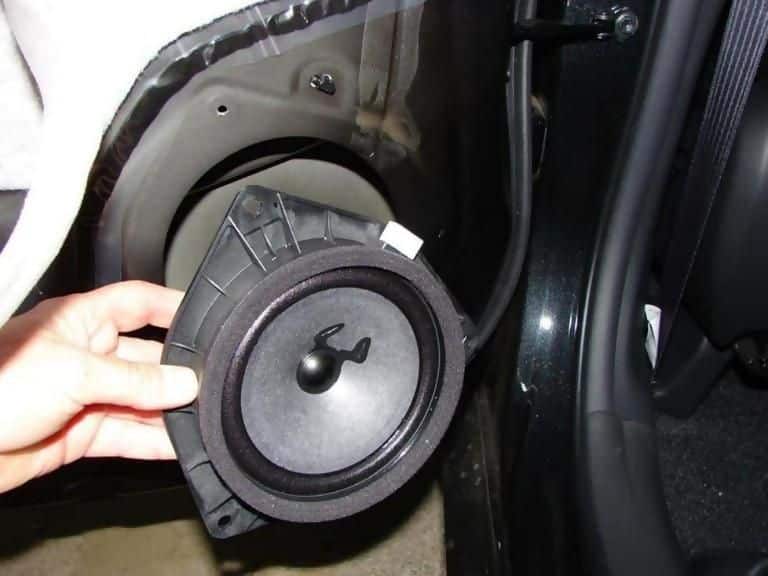
This is a very important step because, in order to complete a perfect repair process, you should know which driver is giving you the problems. Firstly, you will need to remove the sheath section of the speaker which covers the front, which is also known as the speaker grill and is very easy to remove.
- Take out the Speaker Grill
In order to carry out this step, you will need to pull out any kind of wires which are protruding out of the speaker in order to protect yourself from any kind of electrical shocks. Once this is done, you will now need to unscrew the screws which are attaching the speaker driver to the main structure. One thing which should be noticed over here is that you should hold the speaker driver until the final screw is removed in order to make sure that it does not fall and get damaged.
- Disconnect the Old Driver
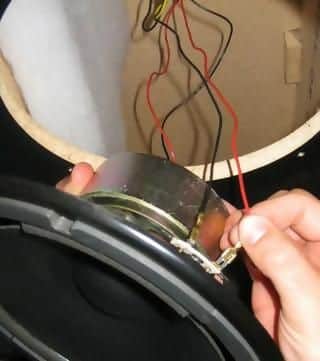
Now, you will need to trace the black and red wires which are connected to the rear side of the speaker. In most of the new speakers, these wires are attached to the hood with the help of a detachable adjustment; whereas, in case of an older speaker, these wires are soldered on the body of the driver itself.
Now, once you have found the red and black wires, you will need to disconnect them from the original driver. So, when the older driver is free from any kind of violence, you can take it out and secure it in a proper place.
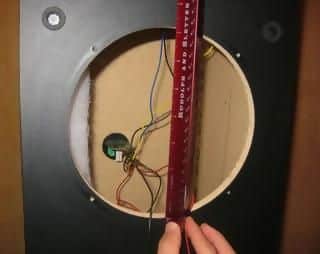
- Measure the diameter of the groove with a ruler.
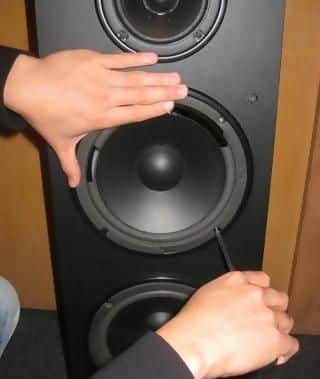
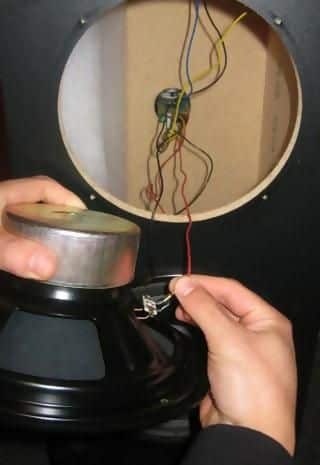
- Install the New Driver
So, once your groove is completely clear of the old speaker driver, you can now install your new driver and ensure that it sits in the groove nicely. Once this is done, you will now need to connect those red and black wires to their original connections and if detachable clips are provided, you will need to find the perfect slots for the clips.
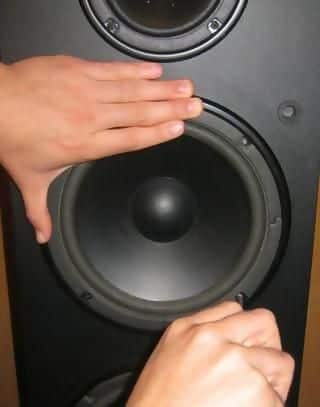
- Attach the Speaker Grill
So, once all these steps are completed and you are completely sure that each and every connection has been connected at the right terminal, you can put back the speaker grill as per the manufacturer’s guidelines.
Here, you have seen an entire step by step guideline as to how to fix a busted speaker. But, one thing which is to be noted during this entire procedure is that you should take care of your safety and always use rubber gloves before commencing any electrical jobs.

Hi music fan! I am Jeff. Hope that you enjoy some stuff I shared here in my personal blog.
About myself, Currently I am in charging as Artist Manager/Music Supervisor at 72 Music Management. I did managed album to Grammy Award in 2017 with 7 Nominations from 2014-2020 and had the opportunities to work with : A.J. Croce, Blind Boys of Alabama, Bobby Rush, Dom Flemons, Dustbowl Revival, Sarah Grace
Governor of the Memphis Chapter of The Recording Academy is one of a award that I am lucky to achieved.